Using XCode for AVR C developement
In this post, I’ll show you how to setup your XCode for AVR developement (in the C programming language) using X-AVR.
X-AVR was born out of my frustration with eclipse as an IDE to program for AVRs. While there is the excellent avr-eclipse plugin (to which I contributed), I wasn’t satisfied with CDT. The devil is in the small details, like the auto-complete propositions order for example.
The (official) Arduino editor was also not an option: it’s basically a barebone text editor with (a rudimentary) syntax coloring. I also prefer to code against avr-libc and not use the arduino’s high level library as the latter results in bloated hex files that won’t fit in smaller and cheaper AVR MCUs (with 1, 2 or 4 Kb flash like the ATtiny13, ATtiny45 or ATmega44 for example).
So I started looking for an alternative. After playing a bit with XCode for general C development, I decided to see if I could also use it for AVR C development.
After a bit of googling, the general consensus seemed to be to create a C project with an external build system (make) and to manually create some targets to invoke the make targets.
There were also a couple of XCode project templates lying around which eased the project creation and setup a bit.
Both approaches present a couple of serious limitations1: no auto-complete, no navigate to declaration/definition, no real time errors highlighting, etc. It’s back to the coding in notepad days.
Enter X-AVR.
X-AVR
From the project’s readme file:
X-AVR is an XCode template for generating AVR C projects.
Now the meta version: X-AVR is a python script which uses the installed avr-gcc and avrdude to generate and install an XCode TemplateInfo.plist file. This template can be used to create AVR C XCode projects with a Makefile to build and upload the program to an AVR chip.
Installation
Head to the project’s readme file for instructions on how to install the X-AVR project template.
Usage
Once the template was correctly installed, select the xavr entry in the create project wizard:
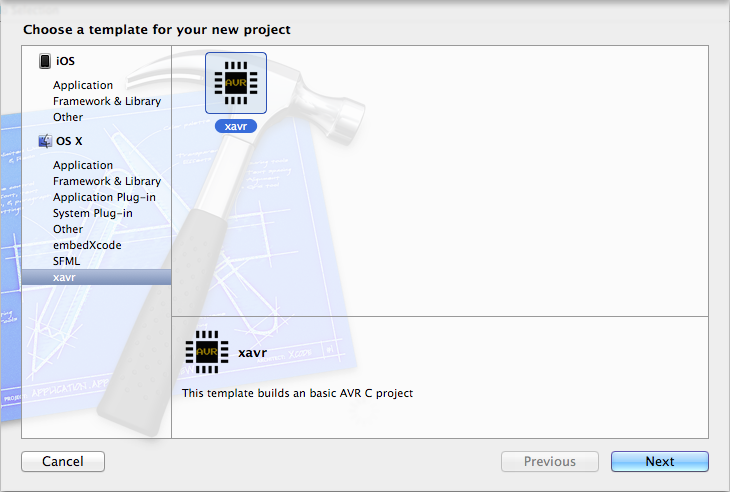
And hit next.
The following screen lets you configure the project:
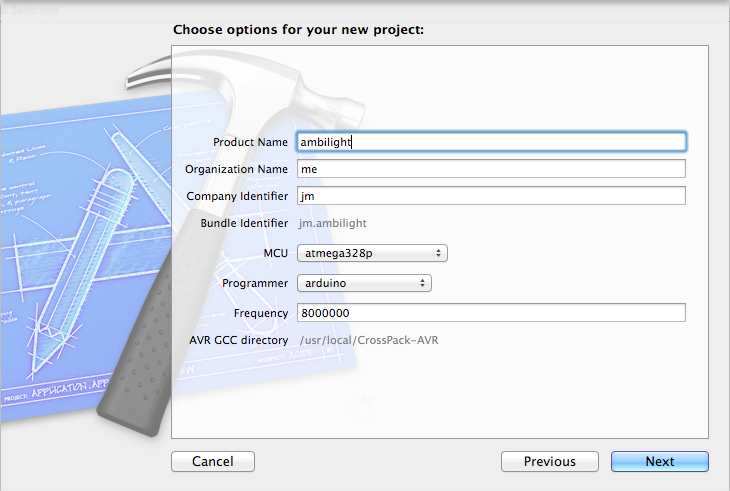
Fill in the project name and select the target MCU, its frequency and the programmer and hit next.
XCode will then create and open the project:
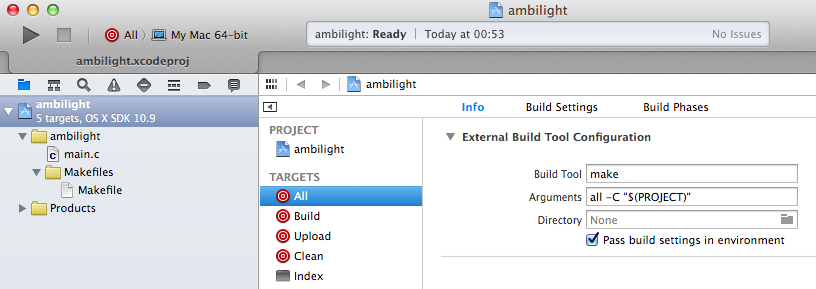
The X-AVR template creates the following files:
- main.c: your program entry point
- Makefiles/Makefile: well, the project’s makefile !
And the following targets:
- All: performs a clean build and uploads the program the the target MCU
- Build: performs a clean build
- Upload: performs the upload the the target MCU
- Clean
- Index: this target makes it possible for XCode to parse, index and verify your program, in addition to the auto-complete. You shouldn’t have to use this target
Here’s a screenshot of the auto-complete in action:
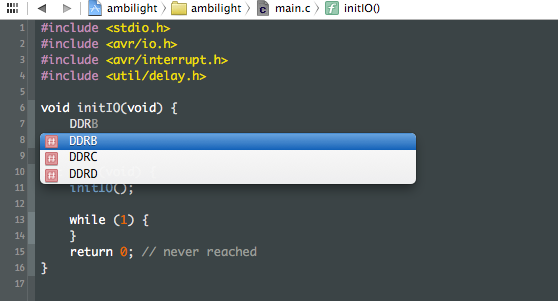
In the previous screenshot, you can see that XCode proposes DDRB, DDRC and DDRD.
That’s because the project was created with ATmega328P as a target.
Here’s what XCode proposes if it was an ATtiny85 for example:
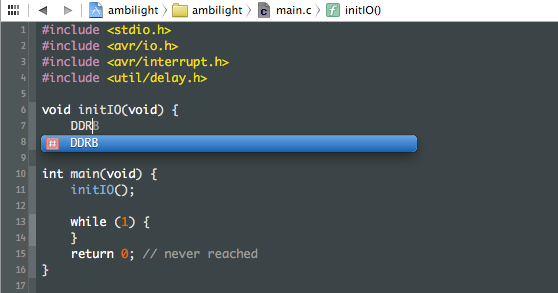
Only DDRB is present, which matches the MCU capabilities2.
You also get error highlighting in the editor:
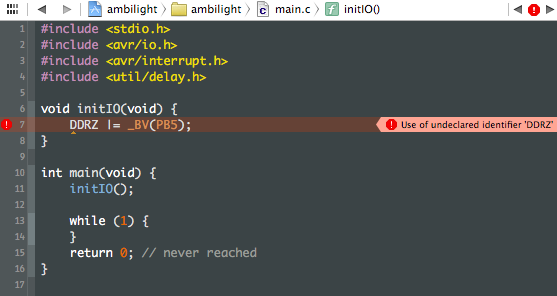
Cmd+Click also works, even for the avr-libc symbols.
Closing words
X-AVR is released as an opensource software under the MIT license.
I’ve published it in the hop that it may prove useful to others besides me. I’d love to get any feedback on it (via Github issues or by leaving a comment)
-
Except for embedXcode which unfortunately generates a C++ project using the Arduino library. ↩︎
-
X-AVR sets the correct
__AVR_*__macro in theGCC_PREPROCESSOR_DEFINITIONSconfiguration option. ↩︎